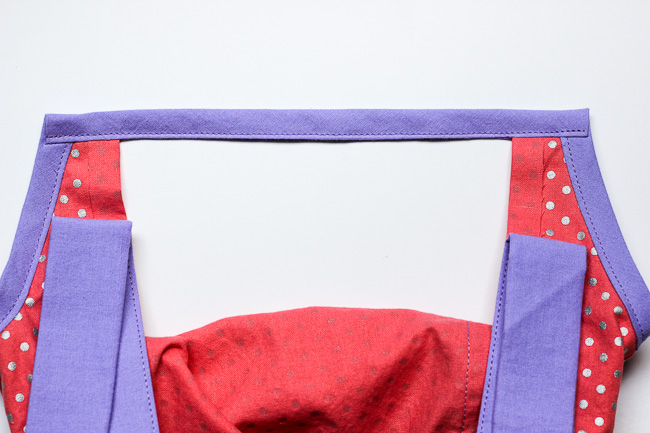
Now that we have finished the Harper Sew-Along, it's time to mix it up a bit! The Harper Dress is perfect as is for summer and layers well for fall, and for an even more fun summer look, I have a tutorial for making an open back. The side panels still allow for plenty of coverage, and the top casing holds everything in place!
The only change to the pattern pieces will be for the back bodice. From the inner strap placement mark corresponding to your pattern size, mark a line 1/2" toward the center fold. This will be the cut line for cutting two back bodice pieces. Be sure to cut the back bodice pieces opposite directions. Also, baste the front two waistbands per the original instructions, but keep the back two waistband pieces separate for now.
Press the inner edge of the back bodice to the right side 1/2".
Place the back straps in line with the pressed edge covering the raw edge.
Top stitch along each edge leaving the top 2" unstitched as in the original instructions.
Pin the back two waistband pieces right sides together with the back bodice pieces sandwiched between them. Align the side and bottom edges of the waistband and bodice pieces. Stitch along the bottom long edge with 1/2" seam allowance.
Press the waistband pieces down wrong sides together. Topstitch along the top edge. Baste the waistband pieces together along the bottom edge.
Attach the skirt per the original pattern instructions.
When you measure the front bodice for the top casing, cut the back bodice casing to the same length.
When you attach the back bodice casing, you will only sew across the partial back pieces.
Once the casing is folded over and pressed, topstitch from arm opening to arm opening enclosing the entire casing.
Insert the elastic in the casing and topstitch the straps as you would for the original instructions.
Enjoy the breezy back!


Remember even though the outside world might be raining, if you keep on smiling the sun will soon show its face and smile back at you. See the link below for more info.
ReplyDelete#back
www.ufgop.org