Showing posts with label London. Show all posts

London Dress Sew-Along // Results and Winners

Tuesday, December 09, 2014

The London Dress Sew-Along has come to a close. We are so thankful for those who participated during this busy time of year!! The creations are all so unique!


The first participation prize of 5 Modkid PDF patterns goes to Kate Bristow-Smith. The second participation prize of 3 Modkid PDF patterns goes to Kelly Gifford. Congratulations!!


I've collected all of the sew-along posts in the Modkid London Sew-Along Page, so you can access these posts at any time through the links in the sidebar of the blog. We love what you make, so keep sharing and creating!

London Sew-Along // Day 5

Friday, December 05, 2014


It is the final day of the London Dress Sew-Along!! We only have a few steps left to wrap things up, so let's get started. As usual, use a 1/2" seam allowance unless noted otherwise. 


With the skirt wrong side out, insert the bodice inside the skirt. Pin the bodice to the skirt right sides together all around aligning the side seams. Be sure that the front of the bodice is facing the front of the skirt (with pockets). Adjust the basted bodice overlap if needed to align seams. 


Stitch the bodice seam and finish with a serger or zigzag stitch. Press the seam allowance down and topstitch along the skirt edge.


Hem the bottom of the dress by folding the bottom edge toward the wrong side 1/4" and again another 1/2". Press and stitch along the inner folded edge. Be sure not to sew the box pleats shut!


Mark button locations on the right side of the bodice to align with the buttonholes. Sew four buttons on the right side of the front bodice.

Pat yourself on the back for a job well done!! I have a feeling you've just made a little girl very happy! Be sure to add your photos to our Facebook group by Monday, December 8th to be entered to win the prizes. You can also share photos on Facebook and Instagram tagged #londonsewalong. We’ll announce the winner next week!

See the rest of the London Sew-Along here:

We’d love to see your progress!! Show us your photos in our Facebook group. You can also share photos on Facebook and Instagram tagged #londonsewalong.

London Dress Sew-Along // Day 4

Thursday, December 04, 2014


Today we move on to the skirt! Stick with the 1/2" seam allowance unless noted otherwise.


Pin contrasting pocket pieces right sides together. Note that there are 3 straight edges and a curved edge that mimics the curve of the skirt. Stitch the three straight edges of the pocket, leaving the curved edge unstitched for turning. Clip the two sewn corners.


Turn the pocket right side out and press well. Using the marking on the pattern piece as a guide, fold the top corner of the pocket down to reveal the contrast fabric and press.


Sew a decorative button in the corner, through all layers of the Pocket, to tack down the flap. Repeat for the second pocket, keeping in mind the opposing direction of the flap. If you are sewing the buttoned up version of the pocket, sew a decorative button near the top inner corner of the pocket on the outside.


Position each pocket onto a skirt panel 3" from the bottom edge of the skirt panel and aligned with the raw side edges. Baste at the raw side edges. Stitch close to the edges of the sewn pocket edges up to the flap at the side, bottom, and top of the pocket. Leave the flap portion open. If you are sewing the buttoned up version of the pocket, sew the bottom and side of the pocket leaving the top open.


To create the inverted box pleat on each skirt panel, take the right most notch at the top of the skirt panel and fold the fabric wrong sides together. Press in place. Bring the pressed fold to the center notch and press again.


Repeat with the left-most notch, bringing the fold to the center notch. Press well. Baste across the overlap. Repeat for the back skirt panel.


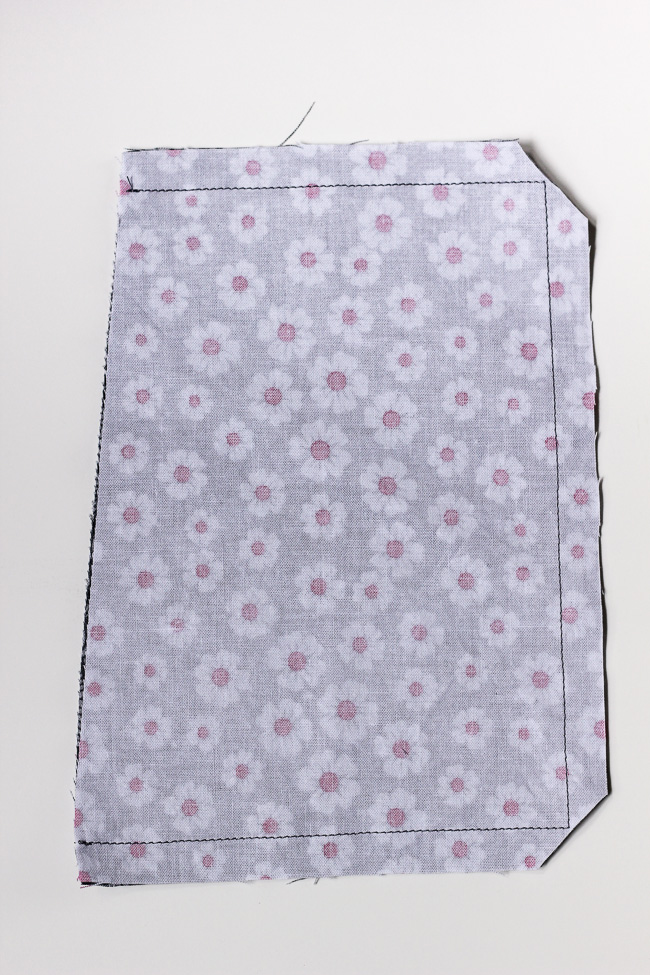
Create the skirt by placing each skirt panel right sides together and pin along both side edges. Stitch sides with a 1/2" seam allowance and finish with a serger or zigzag stitch. 

See the rest of the London Sew-Along here:

We’d love to see your progress!! Show us your photos in our Facebook group. You can also share photos on Facebook and Instagram tagged #londonsewalong.

London Dress Sew-Along // Day 3

Wednesday, December 03, 2014


Let's wrap up that bodice today!! Again, keep in mind all seam allowances are 1/2" unless noted otherwise.


Open up the bodice and align one underarm seam with the other (lining and main fabrics) right sides together. You basically have to twist the fabric around which is a tad difficult to photograph. Pin corresponding bodice pieces right sides together, lining to lining and main to main. Stitch with a 1/2" seam allowance.


Trim the seam allowance to 1/4" and clip along the curve. Turn right side out and press smooth. Repeat for the other underarm seam.


Baste the bottom raw edges of the bodice together to keep the layers from shifting.


Now, let's add that fun pop of lining fabric at the sleeves. Turn the sleeve edges back 1/2" to expose the lining fabric. Press well. Topstitch along the sewn edge of the cuff. Repeat on the other side.


Create 4 horizontal button holes where you marked the bodice on the viewer's left side of the front bodice. Lay the bodice on a flat surface with the side seams aligned. Overlap the left side of the bodice and baste in place at the bottom front. The overlap should be 1/4"-1/2" depending on the size you are sewing. Hold off on sewing the buttons until the end in case you need to adjust the overlap when you sew on your skirt.

See the rest of the London Sew-Along here:

We’d love to see your progress!! Show us your photos in our Facebook group. You can also share photos on Facebook and Instagram tagged #londonsewalong.

London Dress Sew-Along // Day 2

Tuesday, December 02, 2014


Welcome to Day 2 of the London Dress Sew-Along! Today we are working on creating the bodice. We won't finish it until tomorrow, but let's get started! Keep in mind all seam allowance are 1/2" unless noted otherwise.


First, fuse a 3/4"- wide strip of lightweight interfacing to the wrong side of the two opposing front bodice pieces along the diagonal front edge.


Place each front bodice piece on top of the back bodice piece right sides together. Align and pin at each shoulder. Stitch each shoulder with 1/2" seam allowance. Repeat for the remaining front and back lining pieces.


Press the seams open.


Place the bodice lining and main bodice pieces right sides together. Pin around the neckline and down each front diagonal edge. Stitch with a 3/4" seam allowance up the front diagonal edges and with a 1/2" seam allowance around the neckline.


Pin the sleeve openings making sure the shoulder seams align. Stitch with 1/2" seam allowance. Leave the underarm and bodice bottom edges unstitched.


Trim the neck opening to 1/4". Clip the neckline curve and the front corners of the bodice.


Turn the entire bodice right side out. Push out cornets and smooth out the curve. Press all edges well. Topstitch along the front diagonal edges and around the neckline. Tomorrow we will complete the remaining bodice steps.

See the rest of the London Sew-Along here:

We’d love to see your progress!! Show us your photos in our Facebook group. You can also share photos on Facebook and Instagram tagged #londonsewalong.

London Dress Sew-Along // Day 1

Monday, December 01, 2014


I hope you all had a wonderful Thanksgiving and are ready to kick off December with our London Dress Sew-Along. Today we'll be prepping and cutting, so we can get sewing tomorrow.


First, head to your computer and print out your pattern. Here are a few tips I like to use for printing:
  • Print the instruction pages on two sides (front and back). For the London pattern, these are pages 2-7. I like to save ink by not printing the pretty cover and inspiration pages (1, 8-9), but that’s up to you.
  • Print the pattern pages (10-20) on a single side only. Make sure your scaling is set to “none”. 
  • Above all, utilize the test squares to make sure your pattern has printed at the full scale.


Next, cut all pattern pieces of your desired size. Be sure to include the gray/shaded areas in your cuts.


Overlap the shaded areas, as indicated on the pattern pieces, and tape each piece together to form the full pattern pieces.

Now you are ready to cut into your pretty fabric! You’ll need to refer to the cutting diagram in the pattern for the layout. Here is a list of the pattern pieces you will need:
  • Pattern Piece A – Front Bodice: Cut 2 from fabric #1 and Cut 2 from fabric #2.
  • Pattern Piece B – Back Bodice: Cut 1 on the fold from fabric #1 and Cut 1 on the fold from fabric #2.
  • Pattern Piece C – Skirt Panel: Cut 2 on the fold from fabric #3.Transfer notches.
  • Pattern Piece D - Pockets: Cut 2 from fabric #1 and Cut 2 from fabric #2.


On pattern piece A, you will want to mark the buttonholes. The buttonholes will be on the left side of the Front Bodice (from the viewer’s point of view). Transfer the notches along the top edge of the skirt pieces, and mark the fold lines on the outer skirt pocket piece.

Tomorrow we sew!

See the rest of the London Sew-Along here:

We’d love to see your progress!! Show us your photos in our Facebook group. You can also share photos on Facebook and Instagram tagged #londonsewalong.

Modkid Styled - London Holiday

Monday, November 24, 2014

Styling the London Dress for a holiday look was just too much fun! Patty had the idea of incorporating embroidery designs on the fold over flaps of the collar and possibly the pockets. You may want to omit some of the upper buttons in this case, but it's a great way to add a pretty detail. Yet again, I diverged from the suggested fabrics for a dressier style by using a cotton/silk blend.


  1. Blue Radiance Cotton
  2. White Radiance Cotton
  3. Snowflake Embroidery
  4. Purse
  5. Shoes
  6. Tights

London Dress Sew-Along // Schedule and Prizes

Friday, November 21, 2014


As soon as we are back from the Thanksgiving break, the London Dress sew-along begins!! I hope you have narrowed down your fabric options and gathered the rest of your materials. If not, you still have time!!

Here’s a breakdown of what’s in store for the beginning of December….

London Dress Sew-Along Schedule
  • Day 1 – Prepare the pattern and cut the pattern pieces. 
  • Day 2 – Prepare the bodice and sew the buttonholes. 
  • Day 3 – Complete the bodice and sleeves.
  • Day 4 – Sew the pockets and complete the skirt.
  • Day 5 – Attach the bodice to the skirt, hem the skirt, and attach the buttons.
Prizes
Two sew-along participants will be selected at random to win Modkid PDF patterns of their choice!


Here is exactly how to participate:
  • Sew along with us or at your own pace.
  • Ask questions here or in our Modkid Facebook Group.
  • Post progress photos in our Facebook Group or Instagram with hashtag #londonsewalong
  • Photograph your finished dress and add it to the Facebook Group. Post photos of your dress to Facebook and Instagram using the tag #londonsewalong, so we can all find you. 
To be eligible for the grand prize, be sure to add your photos by Monday, December 8th. Please only add photos you don’t mind us sharing on the blog!

Grab your materials, wash and dry your fabrics, and get ready to sew!!

Modkid Styled - London for Christmas

Thursday, November 20, 2014

As you prepare for our London Dress Sew-Along, I have a little holiday inspiration for you. Sewing the London in corduroy gives a slightly more casual Christmas look. Corduroy wasn't listed as a suggested fabric in our supply post, but Patty and I think it would be a perfect fit for the London Dress style! 


  1. Navy corduroy fabric
  2. Crossgrain in Red
  3. Navy embroidered corduroy
  4. scarf
  5. headband
  6. shoes

London Dress Sew-Along // Supplies

Friday, November 14, 2014

We hope you’ve marked your calendar to join in with our London Dress sew-along!! Today, we’re talking supplies, so you can gather what you need before we get started on December 1st.

PATTERN

First and foremost, you will need the London Dress pattern. You have 2 options on where to buy it: Craftsy or Etsy. Remember, coupon code LONDONSAL2014 gets you 20% off your entire order on the Modkid Etsy store. It expires on 11/15/14 at noon EST.  


FABRIC

The suggested fabrics include: quilting cottons, shirting, voiles, gauzes, lawns, linens, denims, and muslins. Here’s you fabric requirements list:


NOTIONS

In addition to fabric, you will need (6)1/2" buttons and a small strip of lightweight fusible interfacing.

Gather all your goods, and come back next week to check out the schedule and prizes!

London Dress Sew-Along

Thursday, November 13, 2014


If you aren't a member of the Modkid Facebook Fan Group, you are missing out on sharing your opinion on our sew alongs!! First, we put the pattern selection to a vote when we hosted over at The Daily Sew. Then, we put a the timing to a vote in our Fan Group. Today, we're revealing the results of both!! As you can see, the London Dress will be our next sew-along slotted for December!

DATES

The sew-along with be December 1st - 5th. So put it on your calendar now! Between now and then we’ll be posting what you’ll need, the schedule, and prizes. During the sew-along we’ll tackle a few steps each day to take you through the pattern. The London dress would make a great holiday dress or Christmas gift!

PRIZES

There will be an overall participation prize awarded at random to one participant. Stay tuned for prize details!

HOW TO ENTER

You’ll want to post your finished dress by Monday, December 8th to be entered to win the final prize. Post photos to our the Modkid Fan Group page. Also, post dress photos to Facebook and Instagram using the tag #londonsewalong so we can all find you. 

WHERE TO BUY and COUPON

Want more good news!?! Coupon code LONDONSAL2014 gets you 20% off your entire order in the Modkid Etsy store. That’s ANYTHING you buy in the shop folks, not just the London pattern!! The coupon code expires on Saturday, November 15th at noon EST. So hurry over to grab your copy!

Modkid Styled - London

Thursday, November 06, 2014

What better way to kick off a new pattern release than with a Modkid Styled!?! Since Patty's girls dubbed the pattern "London" because of it's clean lines and sophisticated style, I found the perfect hat to keep with the preppy tone. Hope you like this as much as I do!


1. Vintage Poppies

2. Dark Blue Texture

3. Crossgrain Grey

4. Hat

5. Tights

6. Shoes

Modkid London

Tuesday, November 04, 2014

If you are anything like me, the anticipation has been building for the next totally new Modkid pattern. I'm thrilled to say it's here!! The Modkid London by Patty Young offers a truly unique style. Patty's daughters even came up with name based on the "sophisticated and fun style 'like a London girl'."

The London dress has 3 wearing styles, without the need of different pattern pieces! The pockets can feature flaps or be sewn flat. By simply folding the bodice different directions or buttoning it up all the way, you end up with different looks.


I have a feeling these images from our lovely testers will express way more than my words about how great this pattern is!


You can purchase the London pattern on Etsy or Craftsy. We can't wait to see what you create!!
Proudly designed by | mlekoshi Playground |