Showing posts with label Perfect Leggings. Show all posts

Modkid Modified // Perfect Leggings with Yoga Skirt

Friday, July 14, 2017


Every July the ladies behind Simple Simon & Company and Project Run & Play host an event called Skirting the Issue.  Skirting the Issue is a month long event where you are invited to sew along by making skirts (and quilts and pillowcases)  to donate to local Foster Care centers for the girls (and boys) to receive. Ready all about it HERE.

For a little skirt inspiration, we've blended two Modkid patterns into the perfect playground skort! You can think of it as the Perfect Leggings with the addition of a yoga skirt. Or, think of it as the FREE Yoga Skirt with the addition of shorts underneath. Either way it's a win! 


You will need knit fabric, the Perfect Leggings pattern and the Free Yoga Skirt tutorial. First, cut the perfect leggings pattern in your desired size. Hold off cutting the skirt pieces until the shorts are assembled. Note: All seam allowances are 1/2" unless noted otherwise.


Assemble the shorts per the pattern instructions until step 4. Basically you will stop when it is time to sew the waistband elastic. I chose to wait to hem the legs until I was ready to hem the skirt, so I would only switch to my twin needle once.


I found the yoga skirt waistband to be a bit tight with this fabric, I recommend measuring the waist of the shorts you just assembled. Use that measurement for the width of the waistband. You do not need to account for a seam allowance, since you want the band to be a bit tighter than the shorts. Use the same height for the waistband, 15", as the tutorial indicates. Also, cut the band in one rectangle so all of our seams with be at the center back. For my skirt, the shorts waist measured 20", so I cut a waistband rectangle 20" wide (direction of stretch) and 15" tall. Sew the rectangle right sides together along the 15" side forming a circle. Fold this tube in half wrong sides together to create the waistband with a finished folded edge and two raw edges. Now is a good time to test the fit on the intended wearer. You want the waistband to fit snugly to hold up the skirt!


Determine the length of the skirt using the same method as the yoga skirt tutorial just be sure the finished length will be longer than the shorts. Cut the skirt that length for the full width of the fabric. Again, keeping it one piece, so the seam will be at the center back. Fold the rectangle in half right sides together and stitch the short ends together forming a circle of fabric.


Now is the time to hem the skirt and the shorts per pattern and tutorial instructions. Then, run a gathering stitch along the top of the skirt. We have a great set of tips and tricks on gathering.


Insert the shorts inside the skirt aligning the top edges and the back center seams with the right side of the shorts facing the wrong side of the skirt. Baste the skirt to the shorts.


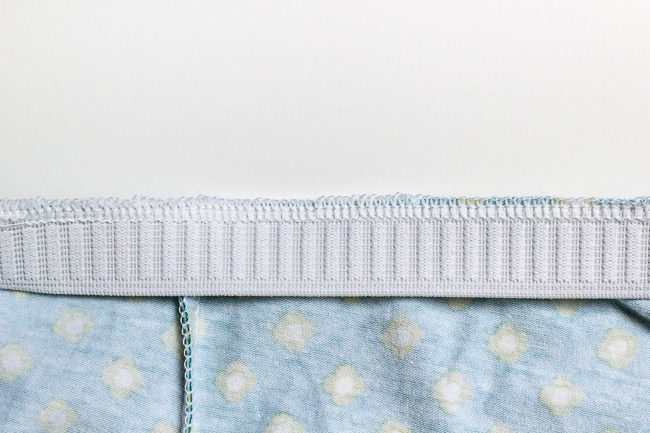
Lay your waistband over the right side of the yoga skirt’s top gathered edge aligning back center seam and keeping raw edges even. The shorts will be on the inside. Pin in place all around, adjusting the skirt’s gathered edge to fit. Stitch with a stretch stitch. You will be stitching through the shorts, gathered skirt, and two layers of the waistband.


Turn the waist band right side out and fold the yoga waistband down.


That's it!! Perfect for twirling, swinging, and hanging on the monkey bars! Don't just limit yourself to shorts here either. Skirted leggings would be equally cute!


Acorn Valley Blog Tour // Day 5

Friday, July 15, 2016


I love it when two creative minds think alike, but with different results! On Wednesday, we had two bloggers feature the same pattern, and today, we have two bloggers featuring the same fabric pairing. Each puts their own spin on a beautiful creation.


Using the Modkid Laguna and Perfect Leggings patterns, Cassy of Pear Berry Lane made some stand out separates. But, this isn't all she created. Visit her blog for 2 additional looks!!


Shelly from Coral & Co. created a comfy and stylish dress with one of the Modkid paper patterns, the Penny

It's Friday! That means we are halfway through the Acorn Valley Blog tour. The good news is we will have plenty more inspiration next week! We'll also be featuring more than just clothing items from some of our bloggers. Stay tuned!!

Monday 7/11: Riley Blake & Modkid
Friday 7/22: Ameroonie Designs

Tips & Tricks: Elastic Waistband

Friday, May 27, 2016


Included in the Modkid Perfect Legging pattern is our favorite knit waistband tutorial. What makes it so great? NO CASING!! Plus, it lays flat, and the elastic won't twist inside a casing. You just might find it to be your favorite too! We are going to show you just how we do it here too.


Stitch your pre-cut elastic into a circle. If you don't have a length provided in your pattern, 1-2" less than the length around the wearer's waist is a good rule of thumb. The elastic should be cut shorter than the waist measurement since it will stretch out when sewn and worn. To minimize bulk, just meet the ends of the elastic and stitch a wide zigzag across the edges. You may stitch several times over the area to reinforce the seam. Give it a tug, and you will find a nice sturdy connection.


Quarter mark your waistband and elastic. Do this by folding the elastic at the seam and marking the opposite fold. Now, bring the seam and the new mark across from one another to divide the band in the other direction. Similarly mark the leggings.


Align the elastic seam with the back seam of the leggings and pin to the wrong side of the fabric. Align the elastic edge with the raw edge of the leggings. Continue to pin at the quarter marks stretching the elastic to fit. Pin in between the quarter marks if desired. Serge or zigzag the top edge of the elastic, catching the raw edge of the fabric beneath. Stretch the elastic slightly as you do this, but do not stretch the fabric. I like to make sure my serger knife is disengaged at this point.


Fold the elastic down toward the wrong side of the garment, encasing the elastic and keeping the fabric taut around the elastic. Pin in place.  From the right side of the garment, topstich the bottom edge using either a Coverstitch machine, a twin needle on your sewing machine, or a wide zigzag stitch.


A flat and easy finish, just like we like it!!

Introducing the Laguna Shirts Collection and Perfect Leggings

Tuesday, May 10, 2016

Modkid recently released some of the most versatile knit patterns that you will really need in your collection!! Let's start with the Laguna Summer Shirts Collection


The pattern includes 4 basic views for tons of variety. Each view begins with the same front and back piece adding to the simplicity.


These are just a few of the great tester photos. This is one of those patterns that can be used over and over all summer long!!


The pattern cover as well as the photos below feature Patty's new knit line for Riley Blake called Acorn Valley


The tops above are paired with the Perfect Leggings Pattern. With three cutting lengths including shorts, capri, and full length, the options can look different every time you sew. 


Don't forget about embellishments!! Patty provides instructions for rings of ruffles as well as a ruched version with a placket.


Play with different hemming options like lettuce-edge rolled hems, or use stretch trims or decorative buttons to add extra flair. Our leggings are designed with a higher rise in the back and a slimmer fit through the legs.

Grab your knits and let's get sewing!!

Proudly designed by | mlekoshi Playground |