Showing posts with label Avery. Show all posts

Shine Bright Blog Tour

Tuesday, January 23, 2018


When a fabric designer releases creations that celebrate girls with their own unique talents and potential, you better believe Modkid will jump at the chance to join the blog tour!! Shine Bright by Simple Simon & Company is a fabric line inspired by the designers' own daughters and created to "inspire confidence in each one of them to let their own lights shine so bright."


Even the names of the prints, like "Smarter Than you Think", "Brilliant", and "Made to Sparkle", draw our attention to worthy character traits. 


To highlight some of the lovely prints, I've sewn up two Modkid dresses for my daughters. My 9 year old is wearing a Modkid Olivia in the prints You Are and Cross My Heart. 


The Olivia pattern has all of the bells and whistles!! The contrast panels of the pleated skirt make for a very classy look. The bodice is fitted with a zipper back closure.


A delicate collar and laced v-neck complete the polished look. Adding gold piping to this collar complimented the gold cross hatch fabric well. 


My favorite part (and my daughter's too) of the "You Are" print is the word search hidden within. She can locate words like smart, noble, intelligent, delightful, unique, and talented. I'm sharing a bit more of the personal side of why this print is so meaningful on my own blog today, but who wouldn't love to validate those characteristics for any female in their life?


My youngest daughter is wearing a Modkid Avery in the Made to Sparkle print. This print is also very fitting for her with her happy smile, bubbly disposition, and empathetic nature.


Again, gold piping and faceted buttons add a bit of brilliance to the complete look.


This blog tour just happened to fall the same week as the Daddy / Daughter Dance, so we have the perfect excuse to celebrate our daughters with dresses that truly shine!

Modkid Modified // Button Back Avery

Wednesday, September 09, 2015

I've been wanting to try this little hack for a while now, because A)  I love a hack B) I love this dropwaist dress! The great thing is that the sewing instructions for changing the Avery Dress from a button front dress to a button back dress are essentially the same! The advantage to a button back, other than a different look, is that you can different details to the front without the obstruction of buttons. Don't forget that the Avery pattern comes in both a paper version and a PDF version!


Like I said, the sewing process is really the same, so I'm just going to show you the alterations you would need to make to the pattern pieces. Don't forget we have the Avery sew-along posts for reference!


First overlay the back bodice piece over the front bodice piece aligning the side seam. Draw a vertical line on the front bodice piece at the edge of the back bodice piece. 


This will be your new fold line. Fold back the front bodice piece along the line, and cut two front bodice pieces on the fold.


Measure the distance on the front bodice piece from the fold line you just created to the edge of the bodice pattern piece.


Now, add that distance you measured to the back bodice with another piece of paper, tissue paper, or freezer paper. Transfer the bottom notch mark. You will need to adjust the buttonhole locations slightly since the back bodice is longer than the front. You will now cut 4 back bodice pieces, not on the fold.


Finally, add a curved back to the collar. You may want to extend the collar instead of just curving it if you want the back of the collar to come closer to the center than mine did. (I forgot to take into account the seam allowance. Opps!) You will cut 4 collar pieces instead of two, and make sure they meet at the center of the front bodice when you baste them in place.

The sewing instructions will now just flip in reference to the bodice button closure.


I'm sharing more about the applique over at Sweeter Than Cupcakes.

13 Days of Modkid Halloween // Day 11

Wednesday, October 29, 2014


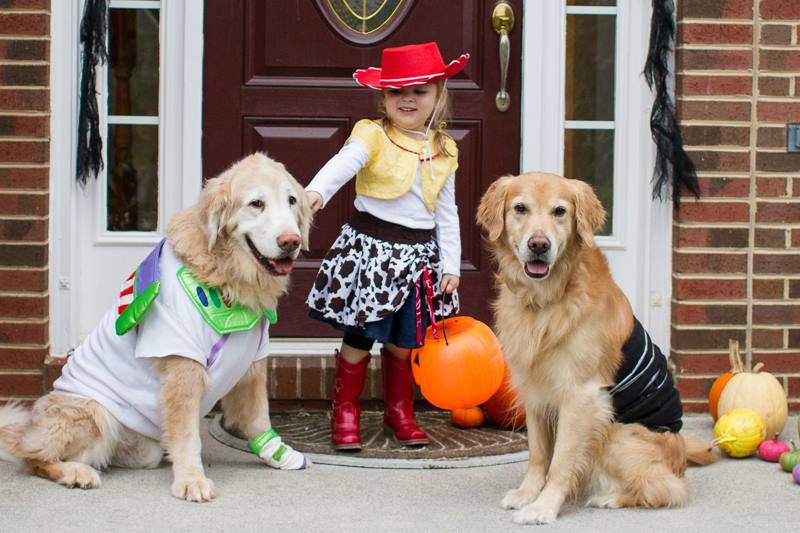
What do you get when you mix cowgirls and characters? Jessie and Sheriff Callie of course! Kelly Gifford is the creator behind the next two costumes. I'm guessing this cowgirl skirt using the Modkid Julia skirt go tons of wear even after Halloween.


Jessie by Kelly Gifford

If you aren't familiar with Sheriff Callie, Kelly gives a little explanation in her blog post. I love how she combined some details of the Julia Skirt with the Avery Dress pattern.


MODKID PDF patterns can be found on Etsy, Craftsy, and YCMT 

MODKID Paper patterns can be found here 

There is still time to share your Modkid Halloween photos. To participate share your photos on Facebook, Instagram or Twitter and tag them with #modkidhalloween or post photos in our Facebook Halloween album. 

13 Days of Modkid Halloween // Day 1

Wednesday, October 15, 2014


Welcome to day one of the 13 Days of Modkid Halloween!! Today, we are showing some amazing costume versions of our Modkid Avery pattern. You may recognize a few from our recent Avery Dress Sew-Along.


Jack Skellington by Kaci Welch


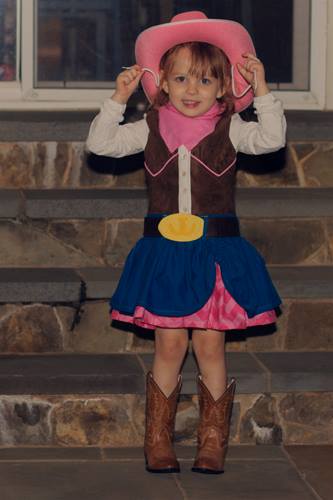
Cowgirl by Rosie Avalos


Emily Elizabeth from Clifford by Kari Steiger


Gastlies Dress by Simone Kleefsman

MODKID PDF patterns can be found on Etsy, Craftsy, and YCMT 

MODKID Paper patterns can be found here 

Remember, we'll be showing your costumes made from Modkid patterns, pdf or paper, each of the 13 weekdays leading up to Halloween. To participate share your photos on Facebook, Instagram or Twitter and tag them with #modkidhalloween or post photos in our Facebook Halloween album. It's that simple!! 

Avery Dress Sew-Along // Results & Winners

Wednesday, October 08, 2014

The Avery Dress sew-along has come to an end. While the dresses are all amazing, my favorite part of these sew-alongs has been the sharing and encouragement the participants give each other. It is a fun way to get to know a little bit about each other as we share our sewing. Once again, I must say we have an amazing Modkid community!!

See Additional Photos Here

From costumes to fancy dresses, these ladies outdid themselves with creativity. Some even pushed themselves to try buttonholes for the first time. Pretty bold when there are 7 buttonholes to sew!! We will be celebrating each participant with a coupon code, but we also had the hard job of selecting winners for the 3 prize packages.


Prize Pack #1 will be going to Jessica Philips for her Harley Quinn costume.


Prize Pack #2 will be going to Anna Ross Larson for her damask dress.


Finally, Prize Pack #3 selected randomly for participation is going to Nita Reynolds.


I've collected all of the Modkid Avery Sew-Along posts on this page. You can access the sew-along pages at any time through the links in the sidebar of the blog. We love what you make, so keep sharing and creating!

Avery Dress Sew-Along // Day 5

Friday, October 03, 2014


It's the final day of the sew-along!! We'll wrap things up today by finishing the gathered skirt portion of the dress. 


Pin the skirt pieces right sides together along each short edge.


Stitch with a 1/2" seam allowance and finish the seam with a serger or zigzag stitch. Repeat for each short edge.


Baste gathering stitches along the top edge of the skirt. I like to do two rows of basting stitches in case one thread breaks. If you stitch one row at 5/8" and one row at 3/8", you can sew your seam in between the basting stitches.


Pull the bobbin threads of the basting stitches to gather the top of the skirt to equal the circumference of the bottom bodice. With right sides together, insert the bodice inside the skirt and pin all around aligning the side seams. Adjust your gathers to distribute them evenly. Stitch with a 1/2" seam allowance and finish with a serger or zigzag stitch. Remove any visible basting stitches.


Press the seam up and topstitch along the bodice.


Hem the bottom of the skirt by folding the bottom edge to the wrong side 1/4" and again another 1/2". Press and stitch along the inner folder edge.


Use your buttonholes to mark the location of the buttons on the right side of the front bodice. Sew 7 buttons at the marks, and pat yourself on the back!!


I have a feeling you've just made a little girl very happy! Be sure to add your photos to our Flickr group or Facebook group by Monday, October 6th to be entered to win the grand prize. You can also share photos on Facebook and Instagram tagged #averysewalong. We’ll announce the winner next week!

 See the rest of the Avery Sew-Along here:

Avery Dress Sew-Along // Day 4

Thursday, October 02, 2014


Welcome back! For day 4 of the sew-along we will complete the upper half of the dress by adding the sleeves and closing up the sides of the bodice. Here is where we run into the pattern variations. I'll be showing you the long sleeve version, view C, so you will need to refer to step 6 of the pattern for the other views. But don't fret, we are here to help if you need it! Join the discussions on our Facebook event to ask any questions you may have.


Let's get started. Keep in mind that the seam allowance is 1/2" unless noted otherwise. Pin a long sleeve to the bodice with right sides together. Be sure to match the single notches at the front of the bodice and the double notches at the back.


Stitch the seam and finish the seam allowance with a serger or zig-zag stitch. Repeat for the other sleeve.


These next steps will be the same for both views B and C. Turn the bodice inside out and pin the side seams right sides together. Pin from the sleeve end to the bottom of the bodice aligning the underarm seams. Sew the seam and finish the seam allowance with a serger or zig-zag stitch. Repeat for the other side.


Hem the sleeves by pressing toward the wrong side 1/4" and fold again by 1/2". Stitch along the inner fold leaving a 1" gap to insert the elastic.


Pin one end of your elastic with a safety pin and insert it through the gap and into the hem. Maneuver the elastic around the casing and back out the gap.  You can pin the other end of the elastic to keep it from creeping into the casing as well.


Overlap each end of the elastic by 1/2" and stitch making sure the elastic is not twisted inside the casing. I stitch back and forth a few times with a zig-zag stitch.

Turn your bodice right sides out and admire your work!! The hardest parts are done! If you are adding the optional belt loops, do that now by referring to page 8 of the pattern.

See the rest of the Avery Sew-Along here:
We’d love to see your progress!! Show us your photos in our Flickr group or Facebook group. You can also share photos on Facebook and Instagram tagged #averysewalong.

Avery Dress Sew-Along // Day 3

Wednesday, October 01, 2014


Today is all about the bodice. We'll attach the collar and the lining, then get those buttonholes all in a row. Again, all seam allowances are 1/2" unless noted otherwise.


Lay your main bodice (not the lining) out on the table with the right side up. With the right side of the collar facing up, align the notch on the collar with the center back notch on the back bodice and pin in place. The front edge of the collar should align with the front notches. Pin around the inside edge of the collar. Baste the collar to the bodice close to the raw edge (1/4" seam allowance).


Place the bodice lining over the outer bodice with right sides together. Pin around the neckline and down each front edge, sandwiching the collar in between. Stitch with a 3/4" seam allowance up the front edges and a 1/2" seam allowance around the neckline.


Clip the front corners and trim the neckline cure to 1/4" seam allowance. Clip the curve, but do not cut into the stitching.


Turn the bodice right side out and press all finished edges well. Push out the corners with a blunt tool. Press the collar down. Topstitch each finished front edge and around the neckline underneath the collar.


Baste the remaining raw edges (sides, font bottom, and back bottom).


Create 7 horizontal buttonholes on the left side of the front bodice where you marked them on Day 1. The buttonholes should be 1/2" wide for sizes 2T to 5 or 3/4" wide for sizes 6 to 10. Be sure to create a test hole in scrap fabrics to ensure a good fit with your buttons.

Overlap the front edges of the front bodice 3/4" and align the front edges with the notches of the opposite side. Baste close to the raw edge at the overlap. Done for today!

See the rest of the Avery Sew-Along here:

We’d love to see your progress!! Show us your photos in our Flickr group or Facebook group. You can also share photos on Facebook and Instagram tagged #averysewalong.
Proudly designed by | mlekoshi Playground |