Showing posts with label Kyoko. Show all posts

Kyoko Sew-Along // Day 5

Friday, May 05, 2017


The last piece to the Kyoko pattern is the Obi. Note: All seam allowances are 1/2" unless noted otherwise.


Cut your one yard length of ribbon in half creating two 18" long pieces. Place the ribbon pieces on top of one obi piece right sides together, lining up the ribbon ends with the short ends of the obi and centering top to bottom. Baste in place 1/4" from the edge. You may want to pin the ribbon tails in the center of the obi, so they do not get caught in the seams.


Lay the other obi piece on top of the one with the ribbon pieces right sides together with the ribbon sandwiched in between. Stitch all the way around the obi leaving a 2" wide opening for turning.


Stitch over the narrow ends again to secure the ribbon ties. Trim your seam allowances and clip the corners.


Turn the obi right sides out. Use a turning tool or chop stick to poke out the corners. Press well and topstitch 1/8" from the edge all around the obi closing the opening in the process. Finish or trim the ends of the ribbon as needed.


The obi ties around the waist of the dress criss-crossing in the back. Secure with a pretty bow! All done!!

Be sure to add photos of your completed Kyoko pattern to our Facebook Group before Monday, May 8th to be entered to win a prize. You can share photos on Facebook and Instagram with hashtag #kyokosewalong. We will post the winner next week!

See the rest of the Kyoko Sew-Along here:

Kyoko Sew-Along // Day 4

Thursday, May 04, 2017


Today, we will construct the skirt of the Kyoko pattern. Note: All seam allowances are 1/2" unless noted otherwise.


With right sides together, sew each skirt strip along the long edge, one to the next, forming one long strip. Finish each seam with a serger or zig-zag stitch.


Press the seams to one side and topstitch 1/8" from each seam.


We are going to apply the bias hem in the same manner we did the sleeves. Open up a piece of your bias tape and pin it right sides together with the bottom of the skirt aligning raw edges. Stitch along the first fold line. Trim any excess bias tape at the ends. Fold the bias tape down toward the seam allowance and press.


 Sew you skirt into a circle by placing one raw edge over the other, right sides together. Stitch from the top of the skirt to the bottom of the bias binding. Finish the seam with a serger or zig-zag stitch. Press the seam to one side. Topstitch the seam from top to bottom. 


Using the crease lines of your bias tape as guides, fold the bias tape to the wrong side of the skirt encased all of the raw edges. Press well. Topstitch 1/8" from the upper fold of the bias tape, making sure to catch the inner folded edge underneath.


Gather the top of the skirt by stitching two rows of basting stitches along the top raw edge of the skirt. Be sure to leave long loose ends. Grab both bobbin threads and carefully pull to gather the top edge of the skirt until it matches the width of the bodice. Distribute the gathers evenly. For a detailed gathering tutorial check out our Tips and Tricks post.


Flip the skirt wrong sides out and insert the bodice inside the skirt so that the right sides are facing and raw edges are even. Align one of the side seams of the bodice with a skirt panel seam and repeat with the other side. There should be 3 skirt panels in front and 3 skirt panel in back. Pin well.

Stitch the skirt to the bodice. Finish the seam with a serger or zig-zag stitch. Press the seam toward the bodice and topstitch 1/8" from the seam. 

The dress portion of the Kyoko is complete!! It can be worn as is or complete the obi with us tomorrow.

See the rest of the Kyoko Sew-Along here:

We’d love to see your progress!! Show us your photos in our Facebook group. You can also share photos on Facebook and Instagram tagged #kyokosewalong.

Kyoko Sew-Along // Day 3

Wednesday, May 03, 2017


I hope you are excited about the way your Kyoko is shaping up so far! We'll attach the sleeves and finish up the bodice today! Note: all seam allowances are 1/2" unless noted otherwise.


Open up a piece of your bias tape and pin it right sides together with the bottom of the sleeve aligning raw edges. Stitch along the first fold line. Trim any excess bias tape at the ends.


Fold the bias tape down toward the seam allowance and press. Leave the rest of the bias tape unfolded until we close up the sleeve. Repeat for the other sleeve.


Pin one sleeve to the bodice right sides together lining up the center, front, and back notches. The center notch should align with the shoulder seam on the bodice. Stitch the sleeve to the bodice. Finish the seam with a serger or zig-zag stitch.


Press the seam towards the bodice and topstitch 1/8" from the seam. Repeat to attach the other sleeve.


Turn the bodice wrong side out. Pin the sleeve and bodice right sides together starting at the open side of the sleeve at the bias tape, matching the under-arm seam, and ending at the bottom of the bodice. Stitch the sleeve and side closed pivoting at the underarm seam. Finish the seam with a serger or zig-zag stitch and press to one side.


Turn the bodice right sides out. Using the crease lines of your bias tape as guides, fold the bias tape to the wrong side of the sleeve encased all of the raw edges. Press well. Topstitch 1/8" from the upper fold of the bias tape, making sure to catch the inner folded edges underneath. Repeat with the other sleeve. Tomorrow we will work on the skirt!

See the rest of the Kyoko Sew-Along here:

We’d love to see your progress!! Show us your photos in our Facebook group. You can also share photos on Facebook and Instagram tagged #kyokosewalong. 

Kyoko Sew-Along // Day 2

Tuesday, May 02, 2017


Welcome to day 2 of the sew-along. If you are using ready made bais tape, you can skip making your own bias tape and get started with your bodice. 

Note: All seam allowances are 1/2" unless noted otherwise.


If you are not using ready made bias tape, refer to the Make Your Own Bias Tape tutorial we posted on Friday. You will need bias tape for the neckline, sleeve hems, and skirt hem.


Now, lets get sewing!! Lay the bodice back on a flat surface with the right side up. Place the bodice front pieces right sides together with the back bodice. Stitch along the shoulder seams. Finish the seams with a serger or zig-zag stitch.
 

Press the seam toward the front of the bodice and topstitch 1/8" from the seam.


Open up the 1/2" bias tape and pin one long edge along the neck opening right sides together. Begin at the one lower point of the criss-cross bodice piece and end at the other lower point. Extend the tape beyond the base of the bodice, so you can trim it even later.


Stitch the bias tape to the bodice along the first fold line of the bias tape, about 1/2". Carefully stretch and shape the bias tape around the curve of the neckline.


Using the creases of the bias tape as a guide, fold the bias tape toward the wrong side of the bodice completely encasing the raw edges. Press well and topstitch 1/8" from the edge of the bias tape catching the inner folded edge on the wrong side. Trim the bias tape ends even with the bodice edge.


Cross the font bodice pieces one side over the other lining up the 2 sets of notches at the bottom of the bodice pieces. Baste across the bottom raw edge 1/4" from the edge to close up the bodice. 

That's it for today! Note: I am not showing lining for this sew-along. For the optional lining, follow the instructions on page 4 of the pattern.

See the rest of the Kyoko Sew-Along here:

We’d love to see your progress!! Show us your photos in our Facebook group. You can also share photos on Facebook and Instagram tagged #kyokosewalong. 

Kyoko Sew Along // Day 1

Monday, May 01, 2017


Welcome to Day 1 of the Kyoko Sew-Along!! We hope you've gathered your supplies, and are ready to get started.

The primary tasks for today are preparing your pattern pieces and cutting your fabric. In order to preserve the size ranges on your paper pattern, I recommend tracing the size you intend to make. I typically use freezer paper from the grocery store since it is somewhat transparent yet sturdy. I have also heard of using medical paper and Swedish tracing paper, but I do not have experience with either. When tracing your pattern pieces be sure to include labels, size, grainlines, foldlines, and notches. 

Use the pattern layout guide based on the view you are sewing to cut out your fabric pattern pieces. Be sure to transfer the notches and pattern markings.

Note: The lining for the bodice is optional. I did not include a lining for this sew-along.  
See the rest of the Kyoko Sew-Along here:

We’d love to see your progress!! Show us your photos in our Facebook group. You can also share photos on Facebook and Instagram tagged #kyokosewalong. 

Kyoko Sew-Along // Supplies

Thursday, April 20, 2017

We hope you've marked your calendar to join in with our Kyoko sew-along!! Today, we’re talking supplies, so you can gather what you need before we get started on May 1st.

PATTERN


First, you will need the pattern. Coupon code KYOKOSAL17 gets you 30% off your entire order on the Modkid Website. That’s ANYTHING you buy in the shop not just the Kyoko Pattern!! The coupon code expires on Friday, April 21st at midnight EST.

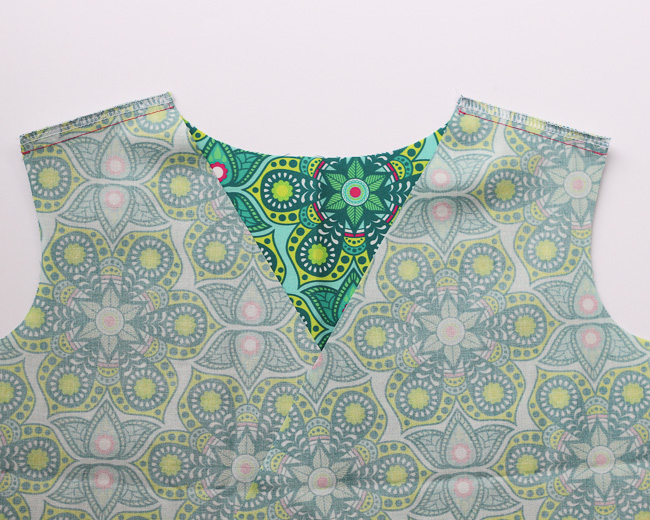
The Kyoko pattern is a paper pattern only and comes in three different size ranges. Click the links below for the patterns. Fabric and notions are listed along with each size.


KYOKO GIRLS'

FABRIC REQUIREMENTS:
View A (shirt with short sleeves)
2T/3T: 1/2 y. for bodice & sleeves, 1/4 y. of 2 fabric designs for stripwork skirt, 1/3 y. of lining (optional)
4T/5T/6: 1/2 y. for bodice & sleeves, 1/3 y. of 2 fabric designs for stripwork skirt, 1/3 y. of lining (optional)
7: 1/2 y. for bodice & sleeves, 1/2 y. of 2 fabric designs for stripwork skirt, 1/3 y. of lining (optional)

View B (dress with long sleeves)
2T/3T: 2/3 y. for bodice & sleeves, 1/2 y. of 2 fabric designs for stripwork skirt, 1/3 y. of lining (optional)
4T/ 5T/6: 3/4 y. for bodice & sleeves, 1/2 y. of 2 fabric designs for stripwork skirt, 1/3 y. of lining (optional)
7: 1 y. for bodice & sleeves, 3/4 y. of 2 fabric designs for stripwork skirt, 1/3 y. of lining (optional)

Obi (sash)
2T/3T: 1/4 yard of fabric
4T/5T: 1/4 yard of fabric
6/7: 1/3 yard of fabric

NOTIONS: 2 packages (or about 4 to 5 yards) of 1/2" wide ready-made double-fold bias tape (or make your own with our easy instructions), 1 yd. of 7/8"wide jacquard, satin or grosgrain ribbon, coordinating thread.


KYOKO TWEENS'

FABRIC REQUIREMENTS:
View A (shirt with short sleeves)
8 - 10: 1/2 y. for bodice & sleeves, 1/2 y. of 2 fabric designs for stripwork skirt, 1/3 y. of lining (optional)
12 - 14: 2/3 y. for bodice & sleeves, 1/2 y. of 2 fabric designs for stripwork skirt, 1/2 y. of lining (optional)

View B (dress with long sleeves)
8 - 10: 1 y. for bodice & sleeves, 2/3 y. of 2 fabric designs for stripwork skirt, 1/3 y. of lining (optional)
12 - 14: 1 y. for bodice & sleeves, 3/4 y. of 2 fabric designs for stripwork skirt, 1/2 y. of lining (optional)

Obi (sash)
8 - 10: 1/3 y. of fabric
12 - 14: 1/2 y. of fabric

NOTIONS:
• 2 packages (or about 4 to 5 yards) of 1/2” wide ready-made double-fold bias tape (or make your own with our easy instructions)
• 1 yd. of 3/4” or 7/8”wide jacquard, satin or grosgrain ribbon
• 1 yard of 1/4” clear elastic
• Coordinating thread


KYOKO MISSES'

FABRIC REQUIREMENTS: Based on 58”/60” wide knit fabric*
View A (shirt with short sleeves)
XS, S and M: 1 yard
L, XL and XXL: 1 1/4 yard

View B (dress with 3/4 or long sleeves)
XS-S-M: 2 yards
L, XL and XXL: 2 1/2 yards

Obi/Sash (All Sizes): 1/2 yard of fabric
Contrast neck band and sleeve bands (All Sizes): 1/8 yard (for knits only)
*Add an extra yard of fabric if sewing with 44”/45” wide woven fabrics

NOTIONS:
• 1 yard of 1/4”-wide clear, knit or braided elastic
• 2 yards of 3/4” or 7/8”-wide jacquard, satin or grosgrain ribbon
• Optional: textured thread (Woolly Nylon®) if sewing with knits

Kyoko Sew-Along

Tuesday, April 18, 2017


DATES

The sew-along will be May 1st to 5th. Put it on your calendar now! Between now and then we’ll be posting what you’ll need, the schedule, and prizes. During the sew-along we’ll tackle a few steps each day to take you through the pattern. The Kyoko Pattern is a paper pattern only that comes in children's, tween, and misses sizing. I'll be showing the children's version, but the steps for the other sizes are essentially the same. We've accounted for extra time for international buyers to order now and join in!!

PRIZES


One sew-along participant will be selected at random to win three Modkid PDF patterns of their choice!!

How to participate:
  • Sew along with us or at your own pace.
  • Post progress photos in our Facebook Group or Instagram with hashtag #aubreysewalong
  • Photograph your finished dress and add it to the Facebook Group. Post photos of your dress to Facebook and Instagram using the tag #kyokosewalong, so we can all find you. 
To be eligible for the grand prize, be sure to add your finished photos by Monday, May 8th. Please only add photos you don’t mind us sharing on the blog!

WHERE TO BUY and COUPON

Want more good news!?! Coupon code KYOKOSAL17 gets you 30% off your entire order on the Modkid Website. That’s ANYTHING you buy in the shop not just the Kyoko Pattern!! Again, here are the Kyoko pattern links: children'stween, and misses. The coupon code expires on Friday, April 21st at midnight EST. 

13 Days of Modkid Halloween // Day 5

Tuesday, October 21, 2014


Not only has the Modkid Kyoko pattern been an overall pattern favorite for years, but it also seems to be a favorite for Halloween costumes. The style lends itself to so many different looks. Talking about possibilities, the Kyoko comes in girl's, teen's, and women's sizes.


Purple Witch By Robin


Princess Ülsa at Dragoncon by Mary Abreu

We just couldn't leave out this adorable Halloween Mini-Kyoko!


Mini-Kyoko Witch Costume by Sew Much More

MODKID PDF patterns can be found on EtsyCraftsy, and YCMT 

MODKID Paper patterns can be found here 

We'll be showing your costumes made from Modkid patterns, pdf or paper, each of the 13 weekdays leading up to Halloween. To participate share your photos on Facebook, Instagram or Twitter and tag them with #modkidhalloween or post photos in our Facebook Halloween album. It's that simple!! 

13 Days of Modkid Halloween // Day 4

Monday, October 20, 2014


It's a new week full of Modkid Halloween inspiration! Who doesn't love Minnie Mouse?!? Here are a couple looks to make those little Minnie fans smile.

Anna Larson gave a fun Asian spin on a Minnie outfit with the Modkid Kyoko pattern.


Kimono Minnie by Evie Pie

If you need a quick sew for a Halloween costume, the Hailey pattern is a great pick. Kari's Minnie styling is perfectly sweet and can be worn well after the holiday.


Minnie by Kari Steiger

MODKID PDF patterns can be found on EtsyCraftsy, and YCMT 

MODKID Paper patterns can be found here 
We'll be showing your costumes made from Modkid patterns, pdf or paper, each of the 13 weekdays leading up to Halloween. To participate share your photos on Facebook, Instagram or Twitter and tag them with #modkidhalloween or post photos in our Facebook Halloween album. It's that simple!! 

Modkid Styled - Halloween Kyoko

Monday, October 13, 2014

We're kicking off the 13 Days of Modkid Halloween on Wednesday, so we've got a little inspiration for you today. With its Asian inspiration, the Kyoko pattern is perfect for a variety of costume ideas. Here, a solid black dress with a pop of color for the bias trim and fun accessories, make for a perfectly adorable witch.


  1. Fabric: solid black cotton
  2. Bias Tape
  3. Witch hat
  4. Boots
  5. Tights

Kyoko sewing pattern for girls can be found here. There is also one for Tweens/Teens, Women and 18" Dolls. If you make one, we would love to see!

Remember, we'll be showing your costumes made from Modkid patterns, pdf or paper, each of the 13 weekdays leading up to Halloween. We NEED your photos!!


To participate share your photos on Facebook, Instagram or Twitter and tag them with #modkidhalloween or post photos in our Facebook Halloween album. It's that simple!! 
Introducing... Kyoko Tweens' and Kyoko Misses'

This is the moment you've all been waiting for! Seriously, if I had a dollar for every email, tweet, FaceBook comment and random request I get for offering Kyoko in larger sizes... well, I could finally pay for someone to come over and tackle the huge piles of laundry that are slowly taking over my house and planning a coup... but I digress. Kyoko has always been our best selling sewing pattern and by far our most requested one to be offered in tweens, teens and women's sizes. So here ya go... your wish is my command!

First off, Kyoko Tweens'... it comes in sizes 8 - 14 and can be sewn with woven or knit fabrics! A million thanks to my cover models, Karli (age 12) and Sophie (age 9) for the beautiful photo.

1-kyoko-tween-cover-500px

KT-potty-girl

And a million thanks to my pattern testers, Marie Villa and Gabriela Marrosu for all your helpful feedback and wonderful photos.

The woven version looks just like our original Kyoko, with the stripwork skirt and bias trim, but has added elastic around the empire waist to cinch it in when it's not worn with the Obi.

Marie-Kyoko-Tween-03

The knit version has a solid skirt panel, instead of a stripwork skirt, to minimize the thickness of the seams, and uses stretch neck and sleeve bands instead of bias tape.

gabi-kyoko-1

Our women's version, Kyoko Misses', comes in a super wide range of sizes... XS to XXL!

1-kyoko-misses-cover-500px

Print

And just like the Tweens' version of this pattern, it can be made with woven or knits, as you prefer. The shirt version looks so cute and comfy with a pair of jeans... doesn't it?

emalee-woven-top

emalee-knit-top

I had a TON of testers for this pattern because I wanted it to be perfect and believe me... they gave me a run for my money! haha I so appreciate all their input, photos and hard work to get this pattern sized and working perfectly! So, a million thanks, with hugs & kisses thrown in, to Marie Villa, Kristen McVane, Melanie O'Brien, Laura Westwood and Mary Abreu. I seriously couldn't have done this without all of you!!

Read Melanie's review of the pattern here.

How 'bout some tester photos?!

Marie-Kyoko-03

kristen-kyoko-3

kristen-kyoko-woven-5

kristen-kyoko-8

And I totally *heart* this one showing the Misses' and Tweens' version together! Thanks, Marie! You rock!!

Marie-Kyoko-Tween-05

So, there ya have it! Let me know what you think. Sizing charts and fabric requirements are on the site and everything is broken down by components as you've all requested.

PHEW! Can I sleep now? Ohhh, nope, I still have 1 more pattern reveal (coming tomorrow) plus new fabric reveal next week and some new products to share! Stay tuned...

Retailers: you can pre-order the new patterns on our website now.
Proudly designed by | mlekoshi Playground |