Sunny Days Tank
A free pattern and video tutorial for Baby Lock
Yes, I know! With temps being in the arctic range in most of the country right now, it is difficult to visualize "Sunny Days", but I promise those days coming and when they do, you'll be ready to celebrate with this adorable tank I designed for Baby Lock.
Fabric shown is Mod Tulip from the Heaven & Helsinki knit fabric collection by Patty Young for Michael Miller Fabrics.
This easy-to-sew top uses two of my favorite sewing techniques, lettuce-edge rolled hems and shirring, which always add lots of pizzazz and flair to any garment! Even if you've never done these techniques before, you'll be able to master them in no time with our detailed instructions and companion video tutorial.
You can download the free instructions for this tank by going to the Baby Lock website and scrolling halfway down the page to the section, "We're on a Serge & Rescue Mission". There, you will find the pattern download link and the video tutorial link, which I've also embedded for you guys below.
Imagine - Sunny Days Tank Project from Tacony Corporation on Vimeo.
Hope you enjoy this first of many exciting projects coming this year, as part of my new partnership with Baby Lock. Can't wait for you to see what we are cooking up!
Showing posts with label projects. Show all posts
Evolution of Lars
(and a book winner!)
I have a super fun project to share with you guys today as we head out to Quilt Market, but first, I need to announce the winner of the Sewing MODKID Style book copy. Thank you all for your lovely comments and for following along with the tour. Random.org chose comment #15, which is.... drum roll please...
VickiT 4:14 PM, who said:
I
cannot wait to see Heaven & Helsinki Patty. Of course, I'm still in
LOVE with Lush. I am still hoping to buy some of that gorgeousness this
month.
Anyway the first thing I would love to try making from your book when I get my copy (hopefully one I will win) would be the Yoga Pants and also the Bloom dress. I might even attempt making a shortened version of the Bloom dress as a shirt to go with the Yoga Pants.
Congrats, Vicki!!! Please email your address to info@modkidboutique.com and Wiley will send you a copy of my book right away!
So, who is this Lars character, you ask? Well, he's nothing less than our Heaven & Helsinki booth mascot! We are so in love with him... we've even joked about buying a crate for him to travel down to Kansas City and putting a leash on him, water bowl, treats, etc.
He started out when I spotted him at our local Neighborhood Thrift while Jon, Emalee and I were shopping for Mid-Century Modern furniture for our booth.
He was made of resin or something, not quite sure, but we all knew he'd be perfect (with a few minor alterations)!
We spray-painted his antlers, hooves and nose.
Then we spray-painted it again and again and again until he had full coverage (boy, that hot pink color is hard to cover!)
Next, the girls took our hundreds of Heaven & Helsinki scraps and Mod Podged him. Oh, the fun they had! I did learn a valuable lesson that day: always put my hair up in a bun when working with Mod Podge! My hair is so long now that even with a ponytail on, I couldn't keep it from dipping into the glue pan and splattering everywhere.... niiiice!
Anyway, after he was completely covered in scraps, we let him dry overnight. The following day, I blinged his eyes... each eye has about 25 rhinestones! Yes, Lars is quite in touch with his feminine side, wouldn't you say?
A couple coats of Polyurethane Spray to make him nice and shiny, and VOILA!
If you'll be at Quilt Market this week, come meet Lars at our booth (Booth #3024-26) and take away one of our catalogs ... you can't miss it!
Another studio project...Ok, so I totally ripped this idea off Heather's blog, but who hasn't? I've already come across a few other blogs with similar postings. She is just such a cool and inspirational chick that you just want to absorb her coolness by association.
So, remember my Easter post where I mentioned that my father-in-law came down for the weekend and helped me with a studio project? This is IT! He did all of the carpentry work... like cutting & sanding & drilling holes and I did the painting and some minor distressing and then he installed it for me and I decorated it. :)
Interested to see how it all came together? If you're not, then don't read on, cuz I'm about to share it all!
We started out with some unfinished wood pieces we purchased at our local home improvement store. One 7" x 48" board that my FIL cut in half to make two 24" x 7" boards. Three wooden brackets. And a 3/8" round dowel.

After prepping all pieces (cutting, sanding, drilling a hole slightly bigger than the dowel onto all 3 brackets), I proceeded to paint. And yes, I had to do it on my kitchen counter because it was below FREEZING outside and the garage was way too cold to work in. I covered my kitchen island with some painters' dropcloth and painted away...

I applied two coats of paint. I used a Dutch Boy color called Mandarin Orange -- I wanted a Satin finish but after the kid at the store screwed up my paint mixing 3 times (ARGH!) and then embarrassingly announced to me that he was now out of Satin and I would have to use Semi-Gloss or switch to another brand, I opted for the former. I then let the pieces dry overnight. It looked OK, but it was a bit too shiny for my liking so I sanded the pieces slightly afterwards to tone down the glare.

My FIL installed it all on Monday morning before heading back to Chicago, and... VOILA! I now have a place to store all my ribbons and a pretty little shelf to hold my button jars and display pretty things. :)

A Peek Inside...

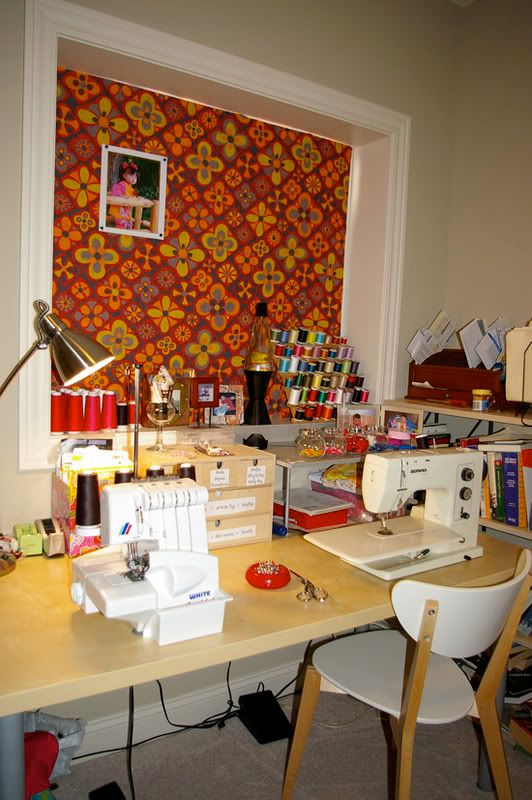
...my sewing studio! I've been asked before to share pictures, but it was always too messy to show... hee hee! So I took a couple of hours this weekend and cleaned it up for you guys (ain't I nice?).
What's that funky pattern covering up the window, you ask? Well, I was getting a ton of glare from the sun peeking in and I just couldn't get anything done, so in order to block out all light I took a large piece of cardboard, cut it to size and covered it with this funky vintage fabric from the 70's. Yes, I am in a dark dungeon now, but at least it's a pretty, colorful, psychedelic dungeon! ;)
And just so the fabric wouldn't get lonely, I paired it up with a lava lamp. The problem is... the only two outlets under my desk are taken up by my sewing machine & serger. Guess I gotta go invest in an extension cord.
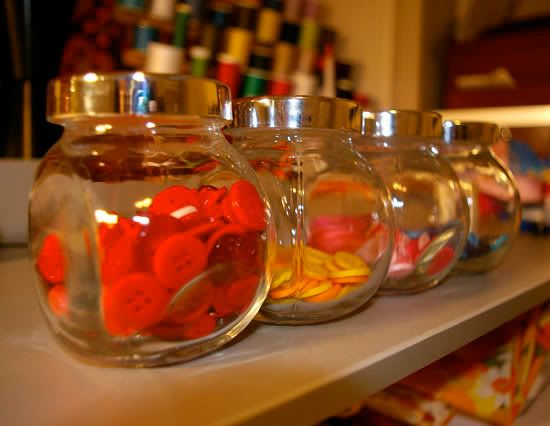
Here's a fun game for ya: how many things can you spot from the store IKEA? Yes, I'm a big fan of affordable minimalist furniture! OK, I'll help ya out: the table and chair are from there, as well as these (they're spice jars but don't they look better as button jars?):
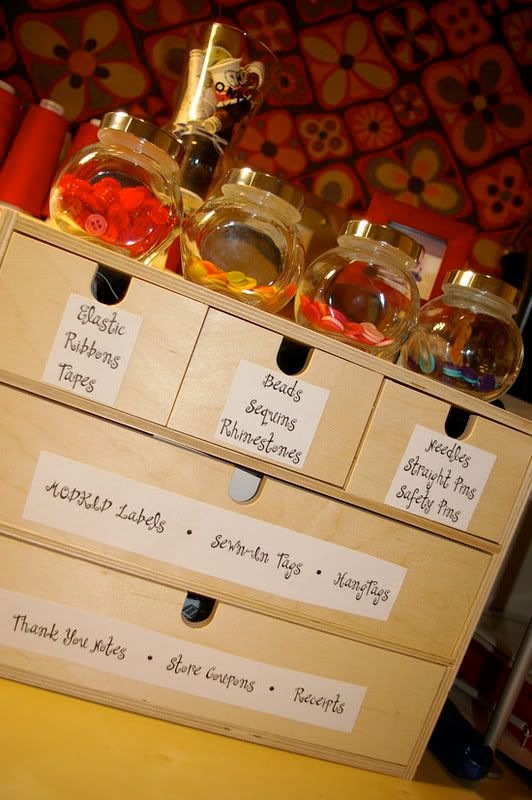
Oh, and this too:
Of course, no sewing room is complete without "the stash":

And the fruits of my labor:

Well, that's the end of the tour! Hope you enjoyed it! Come back anytime.
...my sewing studio! I've been asked before to share pictures, but it was always too messy to show... hee hee! So I took a couple of hours this weekend and cleaned it up for you guys (ain't I nice?).
What's that funky pattern covering up the window, you ask? Well, I was getting a ton of glare from the sun peeking in and I just couldn't get anything done, so in order to block out all light I took a large piece of cardboard, cut it to size and covered it with this funky vintage fabric from the 70's. Yes, I am in a dark dungeon now, but at least it's a pretty, colorful, psychedelic dungeon! ;)
And just so the fabric wouldn't get lonely, I paired it up with a lava lamp. The problem is... the only two outlets under my desk are taken up by my sewing machine & serger. Guess I gotta go invest in an extension cord.
Here's a fun game for ya: how many things can you spot from the store IKEA? Yes, I'm a big fan of affordable minimalist furniture! OK, I'll help ya out: the table and chair are from there, as well as these (they're spice jars but don't they look better as button jars?):
Oh, and this too:
Of course, no sewing room is complete without "the stash":

And the fruits of my labor:

Well, that's the end of the tour! Hope you enjoyed it! Come back anytime.
Subscribe to:
Posts (Atom)