Showing posts with label free tutorial. Show all posts

Modkid Modified: Brooklyn as a Zippered Top

Wednesday, December 12, 2018


After Patty posted a Brooklyn modification make into a top on Instagram, I knew I need to make a top with one more mod. I envisioned adding a quarter zip, but when I laid these fabrics on my table, I knew I had the perfect separating zipper to coordinate. Which brings me to this tutorial for adding a zipper to a top to make it a layering piece. Remember, the Brooklyn pattern comes in girls, tween/teen, and misses' sizing. The same method will work for all three!


The pattern hack to change a top to a zippered jacket is not as difficult as you might think. Instead of cutting the front bodice on the fold, cut two pieces adding 1/2" seam allowance to the side where the fold would be. You will now have two mirrored front bodice pieces. The length of the top is mostly based on the length of your separating zipper. The top of the zipper will be 2" above the neck seam, so for my 20" zipper, I needed the front bodice to end 18" below the neck seam. Taking seam and hem allowances into count, my bodice needed to be 18" + 1/2" seam allowance at the neck + 1/2" seam allowance at the hem = 19". I also sized up 1 size since this zipper top would be worn over another layer. Sizing up 2 sizes would allow for an less slim fit.


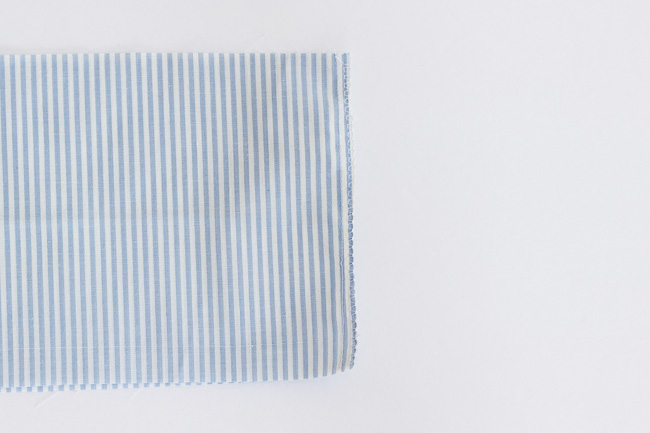
After sewing the should seams, attach the neckband right sides together starting and stopping at the bodice opening. Do not fold the neckband. You are only stitching one raw edge at this point.


Open up the zipper and baste the zipper right sides together with the front bodice. The top of the zipper should be 2" above the neck seam and the zipper stop should be 1/2" from the bottom edge. Pin the top zipper tails so they angle toward the seam allowance.


Fold the neckband down right sides together, so the zipper is sandwiched in between. Using a zipper foot, stitch from the top of the zipper to the bottom. Repeat on the other side of the bodice.


Turn the neckband right side out and topstitch down each side of the zipper securing the seam allowance. 


Fold the neckband in half and pin so the edge of the neckband covers the seam. Topstitch around the neckline with a coverstitch or stretch stitch securing the neckband edges on the wrong side.

Fold the bottom edge to the wrong side 1/2" and hem using a coverstitch, twin needle, or other stretch stitch.


Enjoy adding a new layering piece to your wardrobe!

Modkid Modified // Annika with Gathered Shirttail

Friday, November 09, 2018


Are you ready for some fall sewing inspiration?!? Depending on the weight of fabric used for the Annika Sweater Pattern, this garment can work well for fall or winter. By adding a ruffle shirttail hem, we've created a slightly more feminine look that styles well with jeggings and leggings. In fact, you could easily pair this sweathshirt with a pair of Modkid Perfect Leggings


Let's get to the step-by-step tutorial on creating the gathered shirttail hem. First, prepare the sweatshirt according to the pattern instructions up until the hem bands. For this look, cut two front hem bands and omit the back hem band. Prepare the hem bands, but do not attach them just yet.

Also cut 2 rectangular pieces to create the hem ruffle. The length of the rectangle is 1.5 times the full width of the Annika front bodice piece (not on the fold). In my case, 1.5 x 16 = 24" for a size 6. The height of the rectangle is 5.75" for all sizes. This is based on 2.75" + folded hem band height (2.5" for all sizes) + hem allowance so, 2.75 + 2.5 + 0.5 = 5.75". If you would like the ruffle to extend below the hem further, increase the 2.75" number. In my case, I cut 2 rectangles 24" long x 5.75" high. We've used a woven cotton here, but knit fabric would also work.


Sew the short ends of the rectangles right sides together on one side with a 1/2" seam allowance. Finish the seam.


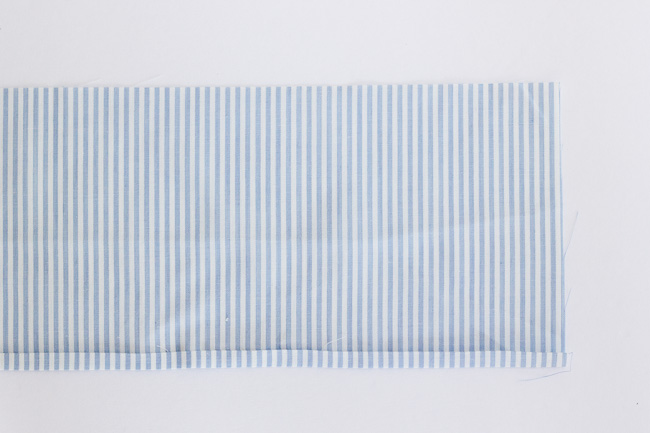
If you like our method of avoiding pressing in the round (tips and tricks link), press a 1/4" hem to the wrong side of the fabric enclosing the raw edge.


Unfold the hem and sew the other short ends of the rectangle right sides together with a 1/2" seam allowance creating a circle of fabric. Finish the seam. Repress the hem at the new seam.


Stitch your hem close to the inner fold. Then, use your preferred gathering method to gather the hem ruffle. Check out our gathering tips and tricks here. Gather the fabric circle to match the width of the Annika bodice.


Pin the hem band pieces to the Annika bodice per the pattern instructions. Baste in place if desired. Next, pin the ruffle right sides together to the Annika bodice with raw edges aligned. The hem band will be sandwiched in between. Stitch the seam with 1/2" seam allowance and finish the raw edges. 


Press the seam allowance toward the bodice and the hem and ruffle down.


Check out Sweeter Than Cupcakes for more photos and fabric details.

Also note, this gathered shirttail hem technique can be used for the Annika Girls, Annika Tween/Teen and the Modkid Breeann with the shirttail hem tutorial.

Club Havana Blog Tour - Sweeter Than Cupcakes

Wednesday, July 11, 2018


Just when you thought the Club Havana Blog Tour was finished we're bringing you a bonus post!! Head over to Sweeter Than Cupcakes for a FREE sunglasses case sewing tutorial


Modkid Modified // Hailey with Elastic Casing

Wednesday, June 27, 2018


The shirred empire waist of the Modkid Hailey top and dress pattern creates a fitted silhouette that is comfortable and stretchy. Shirring with elastic thread is a fun technique to learn, but we often see requests for an alternative. An elastic casing is the solution. After sewing up an eyelet coverup style Hailey for myself, I decided one for my daughter was in order. I have applied an elastic casing tutorial for your use.


In addition to the free shirring tutorial for the Modkid Hailey, we have a knit neck binding tutorial, so be sure to check that out before diving in. After completing the first three steps of the Hailey pattern instructions for the bodice, sew the side seams below the arm opening and finish the seam allowances. Also, sew the side seams of the skirt pieces and finish the seam allowances. You will now have a separate bodice and skirt piece.


Turn the bodice right sides out and place it inside the skirt so that the right sides are together.


Align the raw edges and sew the seam with a 1/2" seam allowance. Finish the seam, but make sure NOT to trim off any of the seam allowance. Press seam allowance toward the skirt.


Sew a casing by stitching the seam allowance to the skirt 1/8" from the finished edge. Leave a 2" gap close to the side seam for inserting the elastic.


Cut a 1/4" wide piece of elastic the same length as the under bust measurement. Using a safety pin or bodkin, thread the elastic through the casing. Overlap the elastic 1/2" and sew the ends together making sure the elastic is not twisted inside the casing. Now is a good time to check the fit and adjust the elastic as needed. Very tight elastic here may not result in a comfortable fit. Sew the casing closed at the 2" opening.


Hem the dress or top and you are done!! You can find more photos of this Hailey on Sweeter Than Cupcakes.

Don't forget that we have 3 different size ranges for the Hailey pattern, GirlsTween, and Misses. This elastic casing method will work well for all three!

Modkid Modified // Sleeveless Vivian

Thursday, May 24, 2018


Sleeveless button-downs and shirtdresses are a classic summer style. Altering the Vivian Shirtdress to a sleeveless style only requires a few basic steps.


Let me walk you through the pattern alterations first. A dress with sleeves will have a larger armscye to accommodate the sleeve and the shoulder will extend to point where the shoulder/arm bend. To avoid gaping without the sleeve, we need to bring the underarm of the armscye up and the shoulder in. Tape a piece of paper behind your pattern piece to construct the changes. The shoulder width I've used is 2.5" for the size 7 shirtdress. I also brought the armscye up by 3/4". These measurements will vary by size, so I recommend checking with an existing shirt or muslin. Keep in mind you will lose an additional 1/4" when the binding is attached. Mark the shoulder point and underarm point then draw a new curve between them.


The same alterations need to be made for the back of the pattern. Overlap the top panel with the bottom panel 1/2" for the seam allowance and align at the armscye. Again, mark the new shoulder and underarm points and draw the curve between.


Trim the pattern to the new armscye.


After completing the dress per the pattern instructions, it is time to apply binding to the armscye. I am using pre-made 1/2" single fold bias tape. Starting pinning the bias tape to the armscye right sides together with the beginning end extending past the underarm seam 1/2". Pin all the way around.


You can see how my bias tape overlaps the underarm seam.


Trim the end of the bias tape 1/2" past the underarm seam so both ends overlap and mark where the seam location is on each end of the bias tape.


Pull your last pins out, so you can bring the bias tape right sides together. Stitch the bias tape at the marked seam.


Press the seam allowance open.


Stitch the bias tape to the armscye in the first fold of the bias tape.


Press the seam allowance toward the bias tape and the bias tape away from the shirt.


Now, press the bias tape to the inside of the armscye making sure the inner fold is tucked inside.


Stitch along the inner folded edge of the bias tape enclosing all raw edges.


Press the seam from the right side for a nice crisp finish.


Don't forget we also have a tutorial for shortening the Shirtdress to a top length. This sleeveless alteration will certainly work well for both styles. 

Modkid Modkified: Cassidy with Piped Heart Pockets

Thursday, February 01, 2018


Just in time for Valentine's Day, we have a little heart inspiration for your sewing using the Modkid Cassidy pattern. We took adding a heart to a garment to a whole new level by creating a heart shaped pocket tutorial. We've added piping to ours, but omitting the piping makes for an even simpler sew.


First cut two heart shapes from your fabric for each pocket you plan to sew, 4 total for the Cassidy. I used the Cassidy pocket pattern piece to gauge the size. If you are using thin fabric, you may want to interface one side.

Start pinning your piping right sides together raw edges aligned to one heart shape. I don't pin all the way around. I just adjust the piping as I sew. You can see I started to clip the piping seam allowance where the piping would curve around the top of the heart. Start your stitches about at the pin I show, so you have a 1" tail.


Using a basting stitch and a piping foot or zipper foot on your machine, stitch the piping around the edge of the heart close to the piping stitches. Clip the seam allowance of the piping as you go around the curves.


As you approach the top point of the heart mark where the point will fall at the seam allowance. When your needle hits that point, leave it in the down position, lift the pressure foot, and pivot the heart and piping to turn directions. You will need to push the seam allowance to the side you have already stitched to continue.


Use the same method of marking and pivoting at the bottom of the heart. Clip into the piping seam allowance in at least two places at the point.


As you near the tail, stop with the needle down. Trim your piping so it with overlap the tail about 1". Open up the piping and pull back the seam allowance to expose the cording. You may need to seam rip the piping stitches.


Trim the cording so that it will butt up with the end of the tail cording.


Fold the piping end to the wrong side and wrap it around the loose tail piping enclosing all of the raw edges.


Continue to baste the piping in place overlapping your stitches.


Place the other heart pocket piece right sides together with the piping sandwiched between. Stitch around the heart with the piping or zipper foot on your machine with standard stitch length and stitches just inside the basting stitch line (You can see the basting stitches in the photo below). Be sure to leave a 1-2" opening along one side of the heart for turning.


Trim the seam allowance and clip into the seam allowance around the curves and at the point of the heart. 


Turn the heart right sides out through the opening. Mark two spots toward the top of the heart where you will stitch the pocket to the dress. Topstitch around the top of the heart between those marks for the pocket opening.


Pin the pocket to the dress front in the desired location using the original pocket markings as a guide. Topstitch the pocket in place between the dots along the lower section of the heart.


 Repeat the process for the pocket on the other side of the dress. Now, your dress is all set for Valentine's Day!!


This pocket technique isn't limited to the Cassidy pattern. Try it on the Harper Dress, Katie Skirt or Zoey Shorts as well!!

Proudly designed by | mlekoshi Playground |